In our first Photoshop tutorial we will create a great looking modern style logo within 5 minutes. You will see how easy it is to create great effects that you would think would take a lot of Photoshopping when in fact only takes a few seconds and only us


UBL Designs Blog
LOGO IN 5 MINUTES - PHOTOSHOP TUTORIAL
In our first Photoshop tutorial we will create a great looking modern style logo within 5 minutes. You will see how easy it is to create great effects that you would think would take a lot of Photoshopping when in fact only takes a few seconds and only using the basics of Adobe Photoshop!
First Step
Now lets start a new document of 800px x 800px, with a white background and at 72dpi. Now do some text like i have below.

Step 2
Now create a new layer and grab the rounded rectangle tool and set the radius to about 15px, draw a rectangle like the image below:

Now create a new layer again and do some text you would like to see within this box. Press CTRL and T and angle the text to something like i have on the image below:

Now select on the the box layer which is below, press and keep your fingure on CTRL button and click on the text layer which you have just created, mine says UBL.
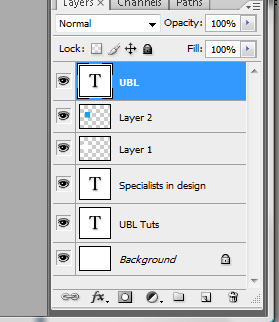
Now let go of the CTRL button and hit the delete button. Now you have done that delete the text layer you created and you should have an image something like what i do here:

Step 3
In the layer section of Adobe Photoshop, Select all layers apart from the background and drag them down to create new layer icon. Then go to layer/merge down. Now goto edit / transform / flip verticle and put it under the logo you have created!
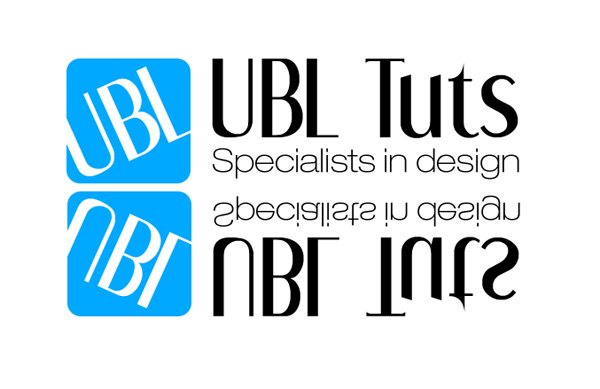
Now lets make it a little more like its on the floor by pressing CTRL and T and then right click and press skew, drag it to the left. Once you have done that, within the layer section click the add layer mask and press d on yoru keypad which will set your forcolour to black. Now grab your gradient tool by clicking the G key. Please make sure your gradient is set from black to transparent, if it is not you can do this by going to the top left and making it so.
Now drag from the bottom of the image to just above the top of the image. You should not have something like this:

Now to make it a little better, press CTRL and T again and move the bottom up a little so it squashes it a little.

Step 4
Create a new layer and press M on your keypad which should give you a rectangle marquee tool. Now do as the image below shows:
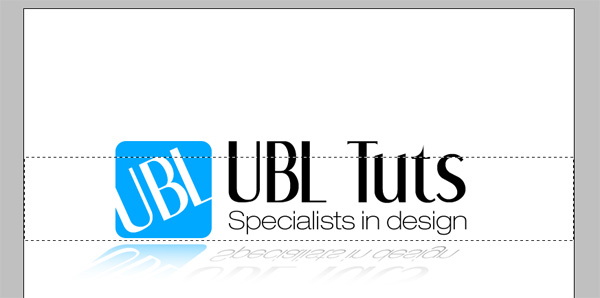
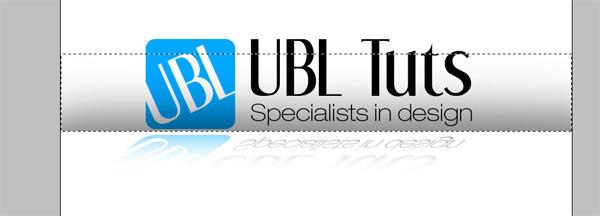
Now press the B key which is the brush key and select the soft round and make it 200px brush and make sure the opacity is set to 20%. Then set your brush to black and draw along the bottom of the highlighted area and you should get something like the image:
Final Step
Now press CTRL and D to release the marquee. Set the layer opacity to around 50%. Now in the layer section of Photoshop, drag the layer you have just created to add new layer and go to Edit / Transform / Flip Verticle and drag it down and set the layers opacity to about 60% and you have something that should look like this:
Comments are now closed for this post... – UBL Designs
