Learn How To Create A Cool Ribbon Icon Set In This Great Step By Step Photoshop

UBL Designs Blog
CREATE A COOL RIBBON ICON IN PHOTOSHOP
Within this step by step tutorial we will learn how to create a high quality ribbon effect icon for social icons, web icons or what ever you need this effect for, you can also download the final result free!
By the end of this tutorial you should have the experience to use the warp tool, blending mode and how to make realistic shadows so that your future projects come to life!
Step 1
Start a new project with a canvas of 256x256 pixels.
![]()
Now grab the rectangle tool and draw a rectangle, the colour does not matter. You should have something like the image below:
![]()
Now grab the polygon tool, select 3 sides and make sure you have selected add to shape, the image below highlights the 3 sides and add to shape section:
![]()
Now create a triangle like the image below:
![]()
Press CTRL and the T key and it should highlight the image, now make it fit the bottom of the rectangle as shown below:
![]()
Now you should have a shape like this one:
![]()
Step 2
Now lets change the colour of the ribbon shape, on the layer of the ribbon double click the thumbnail and a colour window will popup.
Now i selected colour: #7fd861 but you can use which ever colour you like.
![]()
Download this pattern and install it. Now right click on the ribbon layer and select blending options, scroll down to patterns and select the patter you have just downloaded. Set the opacity to 54% and the blend mode to linear burn.
![]()
Now click on the satin blend and make the blend mode: darken, colour black, opacity 27%, angle of around 90 - 95, distance of 47, size of 58 and a contour as like the image below:
![]()
Once you have done that, select the stroke and make sure the size is 1 pixels, position: outside, blend mode: normal, opacity: 100%, fill type: color, colour: (ive used #42802a) but if you have a different colour on the ribbon, just simply select a darker colour than your ribbon.
![]()
you should have something like this:
![]()
Step 3
Now lets make the shadow...
Grab the ribbon layer you have just made, now drag it to the create new layer icon at the bottom of the layer panel, this will duplicate the layer. Right click on the new ribbon layer and clear all styles. Now double click on the thumbnail and select the black colour
![]()
Now go to filter/blur/gaussion blur
![]()
now a message will popup, select yes/continue. Now make it 7px and click ok
![]()
Drag the layer under the ribbon layer and you should have something like:
![]()
Now making sure your still on the shadow layer, go to edit/transform path/ warp. You should have something that looks like this:
![]()
Now shape the warp into something that looks like this.
![]()
now drop the opacity to 60% and it should look like this:
![]()
Step 4
Download this file and install it. Now on the background layer, double click it and press ok. Now right click and go to blend options. Select the pattern you have just downloaded and then you should have something like this.
![]()
Step 5
Ok create a new layer above all other layers, then whilst keeping your finger on the CTRL key click the shape of the ribbon layer, the shape bit is highlighted on the image below:
![]()
Make your foreground colour white and, select the gradient tool and in the layer you have just created drag from the top to about 1cm below, you should now have something like this:
![]()
now drop the opacity to 40%:
Now create a new layer, put the opacity to 30% and make sure your foreground colour is now black. Now select the reflective tool: the reflective section is highlighted on this image, Then at the bottom of the ribbon, make a shape as shown below, to give a shadow effect:
![]()
Now you should have something like:
![]()
Step 6
Lets make some stitching, this is simple, grab the line tool and drag it down, like the image below, make sure the line colour is black:
![]()
Now select the rectangle marquee tool and make a shape at the top like the image below:
![]()
now right click on the line layer and rasterize the layer, the hit your delete button, move it down a few and hit delete again, follow this process until you have something like:
![]()
now drag the layer to the create a new layer which will duplicate the layer, right click and select blending options. Now go to color overlay and make it white. Set the opacity of the layer to 50%:
![]()
Now do the same for the opposite side:
![]()
Do the same for the bottom of the ribbon:
![]()
Step 7
Now lets make the lip effect.
Grab the line tool again, make sure its black, create a new layer and draw a line at the top, like the image below:
![]()
Now draw another line just above, this time make it white.
![]()
Drop the opacity of the white line layer to 50% and the whilst holding shift select both the black line and the white line layer, right click and merge layers.
Now at the bottom of the layers panel click on the add layer mask, make sure the foreground colour is black, also make sure its not on reflective which you put it on before. Then at both sides fade the ends away until you have something like:
St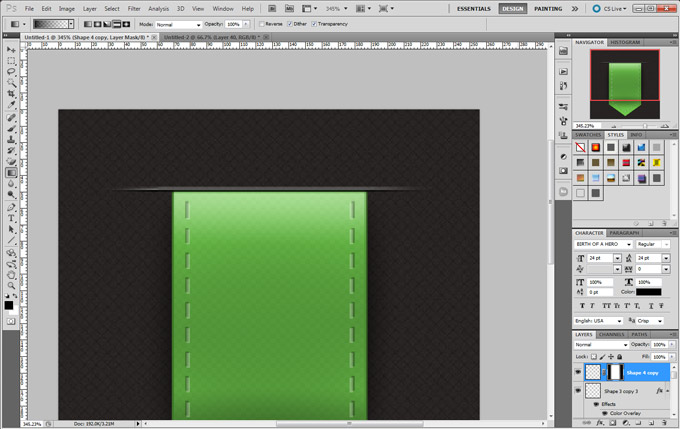 ep 8
ep 8
Start a new layer and make sure your foreground colour is white. Select the gradient tool and make sure it is set white to transparent and then put the gradient to radial, this is highlighted in the image below. Once you have selected the gradient draw a small circle and you should have something like:
![]()
Now go to Edit/Free Transform and stretch it across like the image below:
![]()
Grab the marquee tool and draw a rectangle under the shine as we need a straight edge, like shown on the image below. Then hit the delete button.
![]()
Set the opacity to that layer to 50% and you should now have something like:
![]()
Step 9
Create a new layer and grab the custom shape tool, select the shape you are wanting, i have used the DeviantArt icon, i then go to the layer panel and right click and select blending options, from there i then select inner shadow.
The options i use are: blending mode: multiply, colour: black, angle: 90, distance and choke: 0 and size:4
![]()
Now on the custom shape layer double click on the layer thumbnail and as my ribbon is a light green colour i am using a darker green colour which is #4d5f53.
![]()
Now lets add the text, select the text tool, and create a new layer. Now i used the oswald font but you can use whatever you like, i set the colour to white.
![]()
Now grab the text layer and drag it to the create new layer at the bottom of the layers panel, this has now duplicated it. Then place it under the original text layer, now hit the down arrow key once and set the font colour to black, you should have a shadow effect like shown:
![]()
Final Step
Ok for the final time, create a new layer, now scroll down to the ribbon layer, on the right thumbnail keep your finger on the CTRL key and left mouse click it. This should have highlighted the outline of the ribbon. Make sure you are still within the new layer at the top. Now making sure your foreground colour is black, select the gradient tool, again make sure its set to standard as last time we have radial set. Now drag from the top to about a quater of an inch and then set the opacity of the layer to 70%, you should now have a finished article and something like shown.
You can also see that its resize-able once complete to fit all sizes.
![]()
Comments

Admin 16 Nov, 2012
Sorry this was meant to say: layer, sorry for the mis spelling. We have changed it now :)

Wesley 13 Jun, 2013
In step 2 you say "Download this pattern and install it." but you do not provided a download link,
Admin 13 Jun, 2013
Download this pattern is a download link, just click it ;)

shashikant 10 Jul, 2014
whoo...such a great post. i like it...so much good.

Jannatul Ferdous 29 Oct, 2014
I guess for website design it is really good to make a nice ribbon other than using any built-in one. It gives the freedom to design whatever I want to do. Thank you for the complete tutorial here.

Nahidul Ehsan 12 Jun, 2015
Very creative Photoshop ribbon design. I am going to try it myself but with a different shape. Hope that will also work. Thank you for sharing step by step tutorial!

Karl Johnson 23 Oct, 2017
Thanks for sharing such a useful Photoshop tutorial that helps us to create high quality professional ribbon. It looks best for social media button we can create ourselves, but it requires proper skill and experience of using Photoshop tools. Anyway, if we use this ribbon, it enhances overall user experience.

mukulmamun 4 Apr, 2019
This information was really amazing and informative. Thank you so much for sharing this blog with us.
Comments are now closed for this post... – UBL Designs
Laura 15 Nov, 2012
In step 5 you say: Now create a new div
What is a div?